I’ve learned a couple of tricks in the last couple days that I can’t believe I didn’t know. I was always happy with Apple’s screencapping key combination. A quick Command+Shift+3 and you’ve got yourself a screenshot. I have never been happy with Windows’ alternatives until now. I thought I would share them and hopefully make this a lot easier for everyone else too.
Print Screen
The first way that I learned how to take a screenshot was with the Print Screen button. Press that little button up in the top, right-hand corner of your keyboard and it will copy your desktop to the clipboard.
A lot of people, after that, open up something like Microsoft Word and paste it in there. I prefer to use Paint because they I can crop it and save it directly as a .jpg. It all really depends on what you plan on doing with the screencap.
Alt+Print Screen
Another fun trick I just learned about is using Alt+Print Screen. This will copy just the active window to your clipboard. Now when you paste it you don’t have to worry about cropping or anything. That will save me a little bit of time.
Snipping Tool
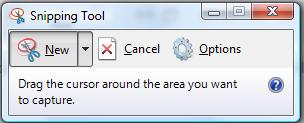
Do you only want to copy just a part of a window? There is an even easier way to do that if you have either Windows Vista or 7. Navigate to Start > All Programs > Accessories > Snipping Tool. This opens up a small box, which you can see to the right, which lets you select an area of your screen to copy. Once you have an area selected it allows you to draw on, save and email your snipping. It’s a very handy little tool.


2 thoughts on “The Art Of The Screenshot”
Those are some good tips. I use a program called Jing because I’ve never been happy with Print Screen either. It’s free and really easy to use – http://www.techsmith.com/jing.html
Jing is a pretty nice program. Honestly, that should be in it’s own post though.